

Key Takeaways
Why Most Price Alerts Fail to Deliver
Price-drop alerts sound like a passive money-saving machine: set it and forget it until the deal lands in your inbox. In practice, most people configure them wrong and end up ignoring a flood of low-value notifications - or worse, miss the deal entirely because their threshold was too tight.
The problem is usually one of three things: too broad a target (tracking every item in your wishlist with no priority), too vague a threshold ("notify me of any price change"), or reliance on a single tool that only monitors one retailer. Retailers also manipulate perceived discounts by inflating list prices before a sale - a tactic that makes a 20% drop look significant when the real discount is closer to 5%.
Done right, price tracking is a system with defined inputs and predictable outputs. The steps below build that system from scratch, starting with the tools and ending with a maintenance routine that keeps alerts sharp without overwhelming you. For a deeper dive into managing notification volume once your setup is live, see Getting the Most Out of Price Drop Alerts Without Being Buried in Notifications.
Tools and Setup Requirements
Before walking through the steps, gather everything you need. The core stack combines a browser extension for real-time price history on product pages with a dedicated price tracker that monitors multiple retailers simultaneously and pushes alerts to your email or phone.
What you will need
CamelCamelCamel
Tracks Amazon price history with detailed charts and sends email alerts when items drop to your target price.
Honey (PayPal)
Browser extension that shows price history on product pages and applies coupon codes at checkout automatically.
Google Shopping Alerts
Sets price alerts across multiple retailers for a given product via Google's shopping index.
Keepa
Advanced Amazon price tracker with granular historical charts, marketplace data, and browser extension integration.
Dedicated email filter/label
Keeps price alert emails organized and prevents them from burying your primary inbox.
Smartphone with push notifications enabled
Receives time-sensitive alerts (Lightning Deals, flash sales) that require faster action than email allows.
A quick note on privacy: browser extensions that offer price tracking and coupon application are not free in the traditional sense - they monetize your shopping behavior data. Before installing, review what each tool collects and whether that trade-off makes sense for you. Our analysis of The Hidden Costs of Free Coupon Extensions breaks down exactly what you're giving up. You can also explore the broader landscape of Price Tracking Apps and Browser Extensions to compare your options before committing to a stack.
Step-by-Step: Building Your Alert System
Follow these steps in order. Each one builds on the last - skipping the historical price research step (Step 3) is the single biggest mistake that leads to buying during a fake sale. The whole process takes under an hour for a focused wishlist of 10-15 items.
Install a price history browser extension
Install either Keepa or Honey from your browser's extension store. Keepa is the stronger choice for Amazon-heavy shoppers - it overlays a full price history chart directly on every Amazon product page, showing you the actual price floor over the past 12-24 months. Honey covers a broader range of retailers and doubles as a coupon finder.
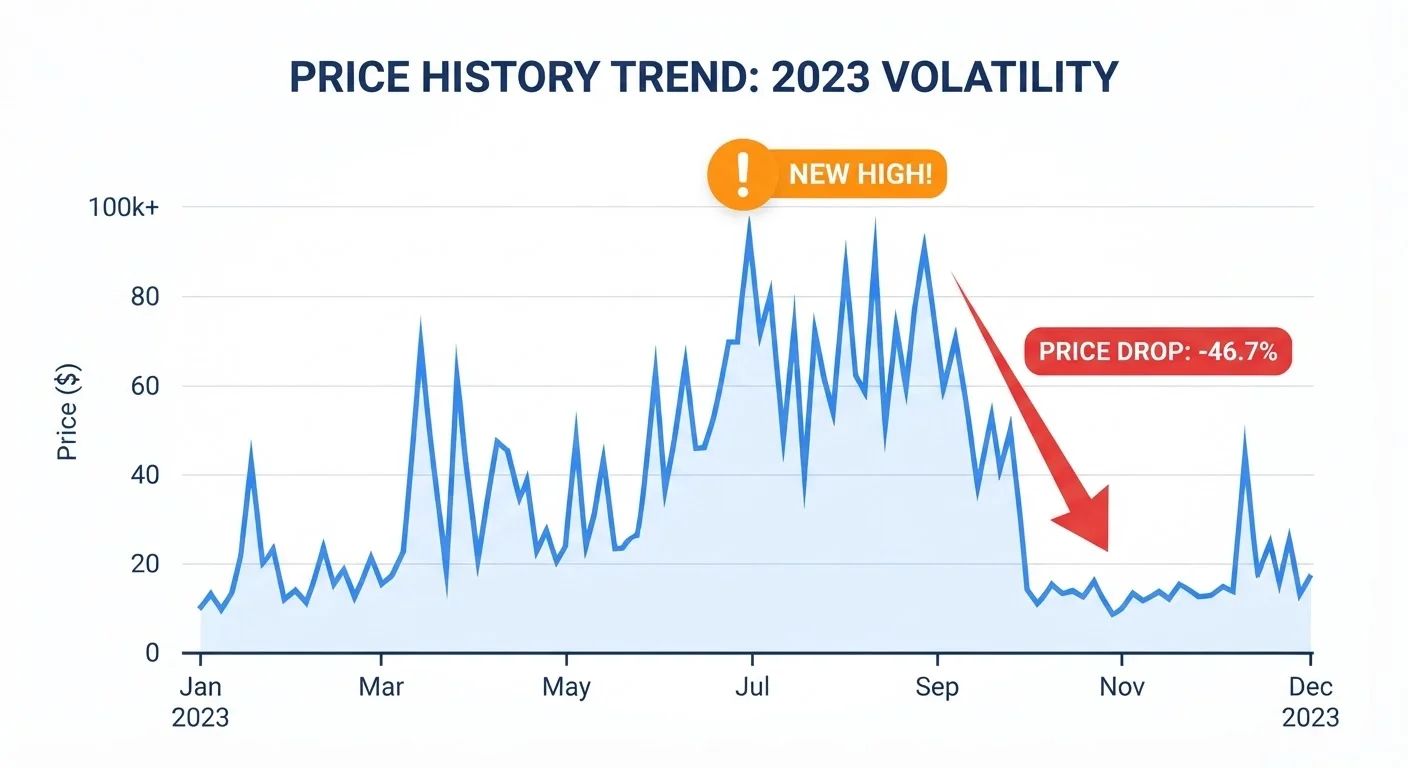
After installing, visit a product page you're considering and immediately check the price history chart before doing anything else. If the current price is at or near a 12-month high, this is not the time to buy - set an alert and walk away. If it's near a historical low, that's actionable information right now.
Create accounts on dedicated price trackers
A browser extension shows you historical data passively - you still have to visit the product page to see it. A dedicated tracker like CamelCamelCamel (for Amazon) or Google Shopping (for multi-retailer coverage) actively monitors prices and pushes alerts to you without requiring a page visit.
Sign up for CamelCamelCamel with an email address and connect it to your Amazon account (optional but enables wishlist import). For Google Shopping alerts, search for any product on Google Shopping, click the product, and look for the "Track price" toggle - no separate account required if you're signed into Google.
Research price history before setting any alert
This is the step most people skip - and it's the most important one. Before you set a target price, pull up at least 12 months of price history on the item. On CamelCamelCamel, paste the Amazon product URL into the search bar and review the chart. Note three values:
- All-time low: The absolute floor the item has ever reached
- 90-day average: A realistic baseline for what "normal" pricing looks like
- Current price vs. list price: Determine whether the list price is inflated (check if it's ever actually sold at list price)
Set your alert target based on where you want to land relative to the 90-day average - typically 10-15% below it for non-seasonal items. Setting your target at the all-time low is often too aggressive and means you'll wait indefinitely.
Configure alert thresholds with a specific target price
On CamelCamelCamel, navigate to the product page and click "Create a Price Watch." Enter your target price - not a percentage, a specific dollar amount based on your price history research. Select your notification method (email is most reliable; push notification is faster for time-sensitive items).
On Google Shopping, use the "Track price" toggle on any product listing. Google will automatically notify you when the price drops, though you have less control over the specific threshold compared to CamelCamelCamel.
For each item, set alerts on both platforms if it's available on Amazon - CamelCamelCamel for precision, Google Shopping for multi-retailer coverage. This redundancy catches deals that appear on one platform but not the other.
Set up notification routing so alerts reach you fast
An alert that lands in a spam folder or a neglected inbox is worthless. Configure your notification routing deliberately:
- In your email client, create a filter that automatically labels all emails from
camelcamelcamel.comandgoogle.comshopping alerts and marks them as important (but does not auto-archive them). - Enable push notifications on your phone for your email app for this label only - this avoids all-day buzzing from non-urgent email while ensuring deal alerts get through.
- For Amazon Lightning Deals specifically, enable Amazon's own app notifications under Settings > Notifications > Deals - these fire faster than any third-party tracker because they originate from Amazon's own systems.
The goal is a two-tier system: email for standard price drops (you have 24-72 hours to act), push notification for flash sales and Lightning Deals (you may have 2-6 hours before stock depletes).
Verify the deal before buying - every time
When an alert fires, don't buy immediately. Run a 90-second verification routine:
- Check the price history chart - is this actually a new low, or just a return to normal after an artificial spike?
- Search the same product on a competing retailer (use Google Shopping or PriceGrabber) - the alerted store may not have the best current price.
- Confirm the seller and fulfillment method on Amazon - third-party sellers often game price trackers with inflated reference prices and artificial drops.
- Check for active coupon codes using your extension before adding to cart.
This routine takes under two minutes and has a direct ROI: it catches deals that look real but aren't, and occasionally reveals that a competing retailer is 8-12% cheaper than the one that triggered the alert.
Don't Mistake a Price Spike Recovery for a Deal
One of the most common traps in price tracking: an item spikes 30% for two weeks, then returns to its normal price - and your alert fires as though it's a discount. Always cross-reference the alert price against the 90-day average on your history chart before acting. A return to baseline is not a sale.
Third-Party Amazon Sellers Can Game Price Trackers
Some third-party sellers on Amazon temporarily inflate their price and then drop it to manufacture a "deal" signal. When an alert fires on an Amazon listing, confirm the seller is either Amazon itself or a well-reviewed third party, and cross-check the price history to rule out artificial inflation in the weeks preceding the drop.
Calibrating Thresholds for High-Value vs. Low-Value Items
Not all items deserve the same alert sensitivity. A 5% drop on a $15 phone case is $0.75 - not worth a notification. A 5% drop on a $900 laptop is $45, and a 15% drop is $135. Calibrate accordingly.
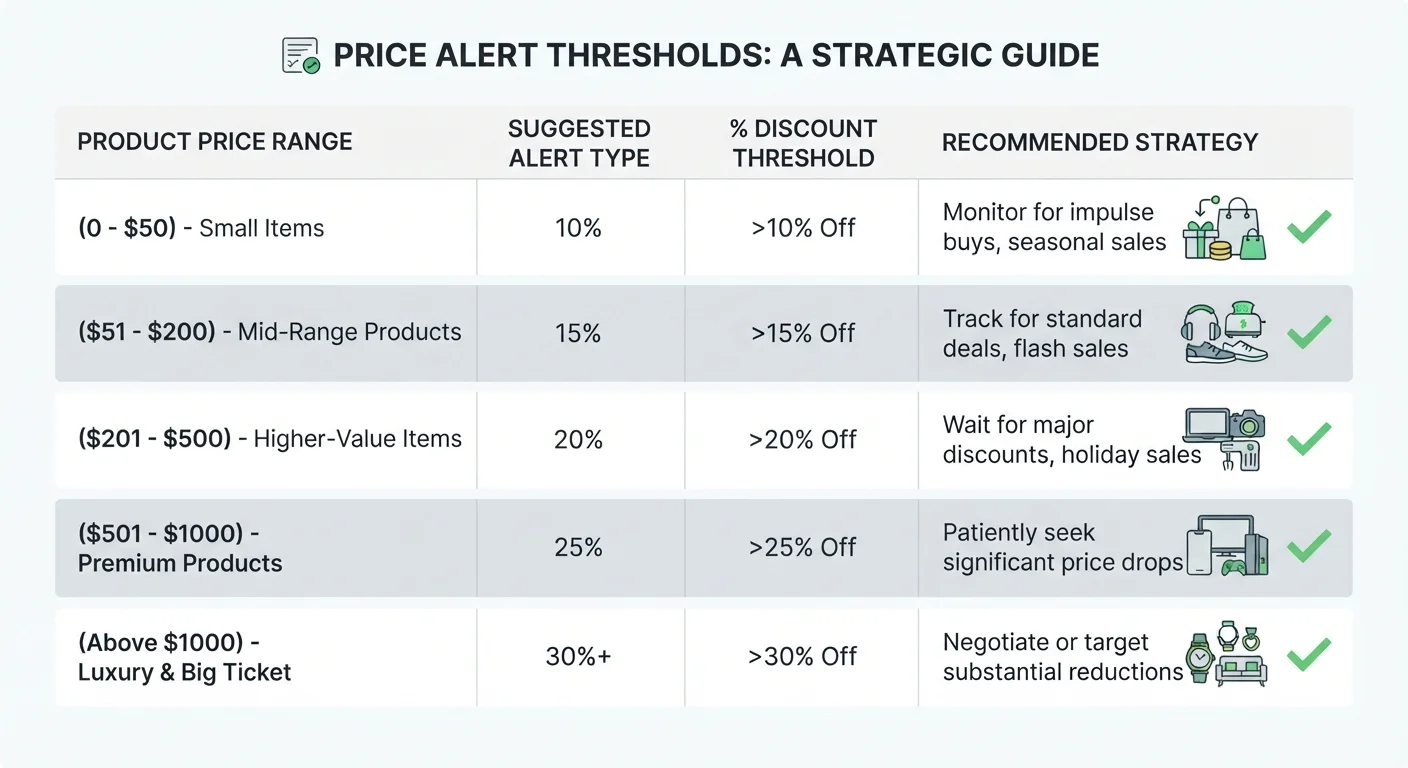
| Item Price Range | Minimum Alert Threshold | Notes |
|---|---|---|
| Under $30 | 20% or more | Small-ticket items need bigger percentage drops to justify attention |
| $30-$100 | 15% or more | Or set a fixed dollar floor of $10-$15 off |
| $100-$300 | 10-15% | Watch for historic low price signals from your tracker |
| Over $300 | 8-10% | Even modest percentage drops represent meaningful savings |
Most dedicated trackers let you set either a percentage threshold or a target price. Use target price when you've done your price history research and know the realistic floor. Use percentage threshold when the item is new-to-market and historical data is thin. Combining both - "alert me when price drops 12% OR falls below $189" - gives you the widest safety net.
Use "Target Price" Over Percentage Drops
Percentage-based alerts sound intuitive but they're imprecise - a 10% drop on an item with an inflated list price is often not a real deal. Set a hard dollar target based on the 90-day price average from your tracker's history chart. That target anchors your alert in reality, not the retailer's pricing narrative.
Stack Alerts With Cashback Portals
When a price alert fires, before clicking through to the retailer, check whether that store is listed on a cashback portal like Rakuten or TopCashback. A $180 item with a 10% price drop plus 6% cashback represents a 15.4% total effective discount - substantially better than the alert alone delivers. Make cashback portal check part of your verification routine.
Revisit Your Alert List Each Season
Product lifecycles are short in electronics and appliances. An item you started tracking six months ago may now have a successor model - in which case the tracked version will see further price drops as inventory clears, but relevance and support life may be declining. Seasonal reviews keep your list aligned with what you'd actually buy today.
Layering in Retailer Markdown Cycles
Price alerts catch drops reactively. Knowing when retailers typically run markdowns lets you set expectations proactively - and sometimes time a manual check before the automated alert fires.
General markdown patterns worth knowing:
- Amazon: Prices fluctuate algorithmically and can change multiple times per day. Lightning Deals expire in hours. Set alerts with email and push notification enabled for any item over $50.
- Best Buy: Major sales cluster around predictable events (back-to-school, Black Friday, post-holiday). Electronics tend to see their annual low in January and late June.
- Target: Clearance markdowns happen on Mondays in most categories. The deeper clearance cuts (50-70%) follow 2-3 weeks after initial markdown.
- Walmart: Rollback pricing is inconsistently timed but tends to align with competitor price matches. Cross-check with Amazon pricing.
If you're planning seasonal purchases, pair this strategy with Winter Clearance Shopping Done Right - the markdown schedule breakdown there applies directly to how you should time alert thresholds for end-of-season items.
Maintaining and Pruning Your Alert List
An alert system that's never maintained becomes noise. Set a recurring calendar reminder - monthly works for most people - to do a 10-minute list audit. During each audit, ask three questions about every tracked item:
- Is the need still real? If you've already solved the problem another way, delete the alert.
- Has the price history shifted? If the item's baseline has risen 20% since you set the alert, your target price may no longer be realistic. Adjust or archive it.
- Has a newer model released? Tracking last year's version while this year's model is available means you're chasing a product with declining relevance. Either update to the new SKU or reconsider the purchase entirely.
Keep your active tracking list tight - 15 to 25 items is a manageable ceiling for most shoppers. Beyond that, cognitive load from alerts compounds and you start dismissing notifications reflexively, which defeats the purpose entirely.
Alert Fatigue Is a Real Cost
When you receive too many low-quality alerts, you start dismissing them reflexively - including the ones that matter. Every alert that fires on a marginal deal trains you to ignore the system. Set thresholds high enough that each alert represents a genuinely compelling buying opportunity, not just any price movement. Quality of signal matters more than volume.
The goal is a lean, high-signal alert system that interrupts you only when a real buying opportunity exists. Every tweak you make to thresholds, notification channels, and list size moves you closer to that outcome.