
Dividing and Propagating Plants: The Mechanics of Growing for Free
Many garden plants can be multiplied at no cost through division, cuttings, or layering. Here's how each method works and which plants suit it.
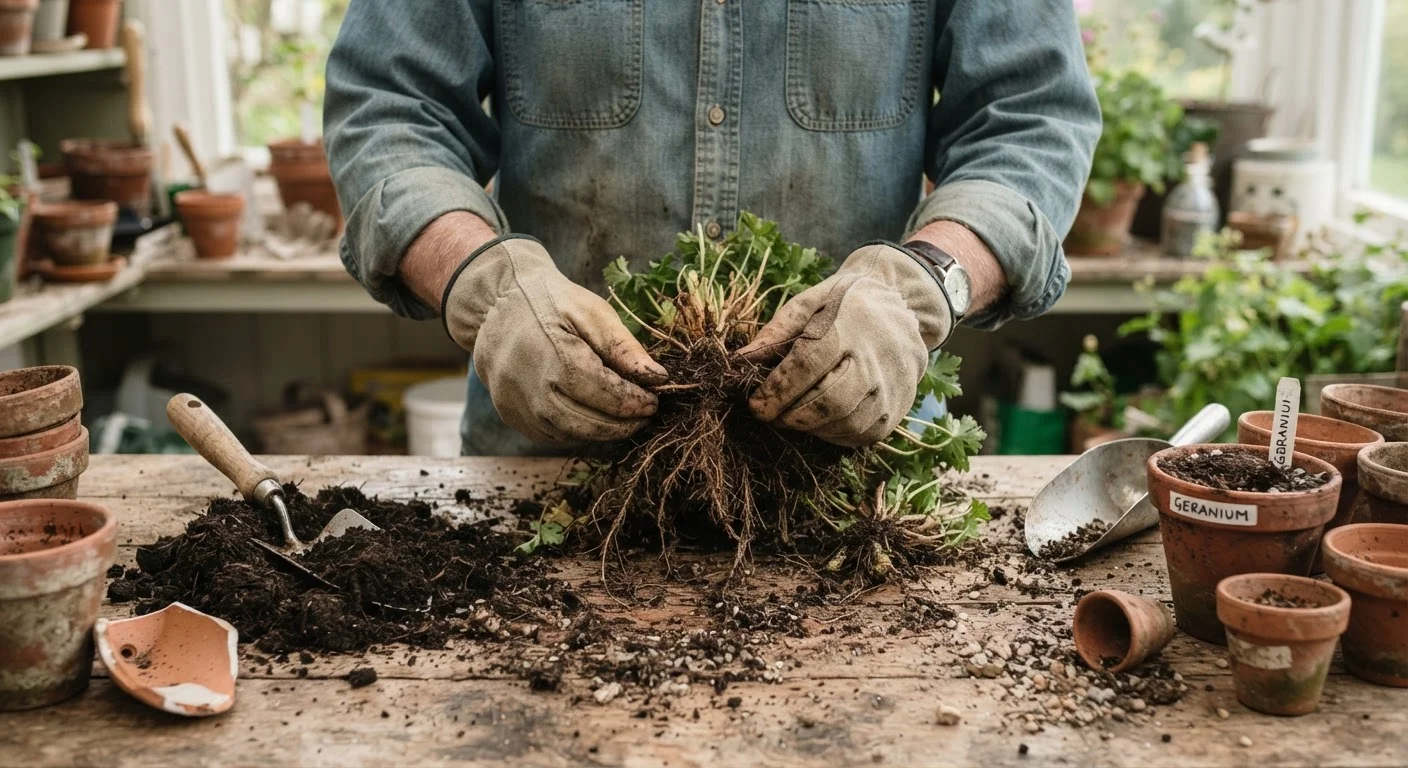
Photo: SaverSteals.com | Explore More. Shop Smarter. editorial
—— In This Article
Key Takeaways
- Division, stem cuttings, and layering are the three main propagation methods suited to home gardeners.
- Most perennials benefit from division every three to five years, which also improves plant health.
- Stem cuttings work well for many herbs, shrubs, and tender perennials with minimal equipment needed.
- Layering requires no separation of plant material until roots have already formed, reducing failure risk.
- Timing propagation to match a plant's active growing period significantly increases success rates.
Why Propagation Is One of Gardening's Best Value Skills
Buying new plants every season is one of the most avoidable gardening expenses. Many of the plants already growing in your garden — or in a neighbor's — can be multiplied at little to no cost using techniques that have been practiced by gardeners for centuries. Propagation does not require specialist equipment or advanced horticultural knowledge. What it requires is understanding which method matches which plant, and doing the work at the right time of year.
This skill pairs naturally with other budget strategies. Sourcing plants through community swaps and local groups gives you raw material to propagate further, effectively multiplying a single free plant into a dozen. And if you are thinking about your garden spending more broadly, building a productive garden on a tight budget covers the wider picture of where your money is best spent from the start.
What you will need
The three methods covered in this guide — division, stem cuttings, and layering — each suit different plant types and different skill levels. All three are achievable in a single afternoon with tools most gardeners already own.
What You'll Need Before You Begin
Sharp Garden Spade or Knife
Used to cut cleanly through root clumps when dividing perennials, minimizing damage to plant tissue.
Pruning Shears
Used for taking stem cuttings cleanly from the parent plant without crushing the stem.
Rooting Hormone
A powder or gel applied to cutting bases to encourage faster, more reliable root development.
Small Pots or Seed Trays
Containers for rooting cuttings or holding newly divided plant sections while they establish.
Clear Plastic Bag or Humidity Dome
Placed over cuttings to retain moisture and create a humid microclimate that supports rooting.
Most of these items are already common in a basic garden toolkit. Rooting hormone is the one optional purchase worth considering if you plan to take a large number of cuttings — it can meaningfully improve success rates with woody or slow-rooting plants, though many softer-stemmed plants root readily without it.
Step-by-Step Propagation Instructions
Identify plants suitable for your chosen method
Different plants suit different propagation approaches. Clump-forming perennials such as hostas, daylilies, ornamental grasses, and coneflowers respond well to division. Herbs like rosemary, lavender, and mint, along with many deciduous shrubs, are good candidates for stem cuttings. Climbing plants, roses, and some fruiting shrubs such as forsythia are well suited to layering.
If you are unsure which method applies to a specific plant, a quick search of that plant's propagation requirements will clarify. Starting with a method well-matched to your plant dramatically improves your results.
Divide established clumping perennials
Water the plant thoroughly the day before. Dig around the outer edge of the clump with a spade, then lift the entire root mass from the ground. Place it on a flat surface and use a sharp spade or garden knife to cut it into sections, each containing at least two or three healthy shoots and a portion of the root system.
Replant sections promptly at the same depth they were growing, water them in well, and keep the soil consistently moist for the first two weeks. Division is most successful in early spring before new growth is more than a few inches tall, or in early fall when temperatures begin to cool.
Take and root stem cuttings
Select a healthy, non-flowering shoot and cut a 3–5 inch stem section just below a leaf node using clean pruning shears. Remove leaves from the lower half of the cutting, leaving two or three at the top. If using rooting hormone, dip the cut end into the powder or gel and tap off any excess.
Insert the cutting into a small pot filled with moist potting mix or a mix of perlite and peat. Cover loosely with a clear plastic bag or humidity dome to retain moisture, and place in bright indirect light. Check for rooting after three to four weeks by gently tugging — resistance indicates roots have formed.
Use layering for low-effort propagation
Layering works by encouraging a stem to root while it is still attached to the parent plant. Select a flexible, healthy stem and bend it down to soil level. At the point where it touches the ground, remove a small ring of bark or make a shallow wound on the underside of the stem — this encourages rooting at that point.
Bury that section of stem two to three inches deep, securing it with a U-shaped pin or a rock, while leaving the growing tip above ground. Keep the area moist. After six to ten weeks, check for rooting by gently tugging the buried section. Once roots are established, sever the stem from the parent plant and allow the new plant to grow independently for a few more weeks before transplanting.
Harden off and transplant new plants
Divisions replanted directly in the garden require consistent watering for two to three weeks but generally transition quickly. Cuttings grown in pots indoors or under cover need a gradual acclimatization period — move them outdoors to a sheltered spot for increasing lengths of time over seven to ten days before placing them in their permanent position.
Once plants show active new growth, they are ready for their final planting location. Work organic matter into the planting hole, set the plant at the correct depth, water thoroughly, and mulch around — but not against — the base to retain moisture and suppress weeds.
Avoid Spreading Plant Disease
Always use clean, sharp tools when dividing or taking cuttings. Dirty blades can transfer fungal or bacterial diseases between plants or sections. Wipe tools with a diluted bleach solution or rubbing alcohol between cuts, especially when working with multiple plants in the same session.
Work through each step systematically and be patient — propagation timelines vary by plant and season. A cutting that appears to do nothing for three weeks may suddenly produce vigorous new growth in the fourth.
Timing Your Propagation for Better Results
Propagation success is closely tied to timing. Division works best in the shoulder seasons — early spring or early fall — when plants are not under heat stress and the soil is workable. Stem cuttings from most herbaceous plants succeed in late spring through midsummer, while semi-hardwood cuttings from shrubs are taken in late summer. Layering can begin in spring and left through the growing season.
Label Everything as You Go
Divided sections and rooted cuttings look nearly identical before they mature. Use waterproof plant labels or popsicle sticks and a permanent marker to note the plant name and the date propagated. This saves confusion later and helps you track which methods worked best for future reference.
If you want to align your propagation activity with broader purchasing decisions — for instance, buying one specimen plant and then multiplying it — understanding when plant prices drop throughout the year can help you time that initial purchase well. For a full picture of how propagation fits into a garden-wide cost reduction strategy, see our complete guide to spending less across every part of your garden.
Don't Divide Stressed or Drought-Affected Plants
Dividing a plant that is already under stress from heat, drought, or disease puts it at serious risk of failure. Water plants thoroughly a day or two before dividing, and choose a cool, overcast day when possible. Newly divided sections need consistent moisture to establish their root systems.

Home & Garden Editorial Team
Home & Garden Editorial Team is the collective byline for our editorial team and contributor network. Articles published under this byline or an editorial pen name are researched, written, and reviewed according to our editorial standards for clarity, consistency, and independence before publication.
View author profile